Base repair
How to repair the base of your skis or snowboard?
Ski or snowboard bases tend to wear faster than the rest which makes sense as it is the part that’s constantly in use when you ride. When it’s brand new and well waxed, it glides effortlessly on a very thin layer of water. But after a few days of riding, a few rocks, a few branches and a few queues for the lift, bases can get scratches or gouges which will affect their gliding performance. In order to fix this, we have an entire corner of our store dedicated to repairing bases. Read more Show lessUser guide for repairing your ski base
If your base is damaged do not wait too long before fixing it, especially if the gouge is close to the edge. The good news is, it’s really easy to do it yourself, you don’t need to bring your ski to a shop or have a professional skier to do it. You will find the tools and materials needed on our website as well as a user guide leading you through every step precisely.
How to fill a gouge in the base of your board or ski?
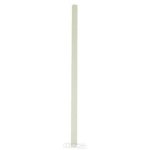
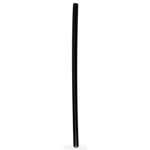
It can look like magic to those who have never done it before. If you have ever brought a board you damaged to a skiman for a repair, you were probably impressed by the result. The base looks brand new and sometimes you can’t even see where it has been repaired. Well, guess what, you can have the same result easily! The first thing to do is to buy the material you’re going to repair the base with. We have a selection of repair sticks made of polyethylen which is the same material as your base. You can find two colours. Black or transparent. Use black for black bases and transparent for any other colour. You’ll see, it’s a child’s play. Start by cleaning your base. The cleaner, the more the repair will last. Use a bronze or copper brush to do so. Always brush in the same direction, from tip to tail. When it’s clean from any debris or dust, use a lighter to light the polyethylen stick. Keep heating it until the stick remains on fire. It will start to melt and to drip. Hold it over the gouge and make sure it drips in it. Fill the gouge completely, better use too much polyethylen than too little. When you’re done, let it cool down for 20 or 30 minutes. During this time, the material will blend with the base. Then, all you have to do is to scrape off the excess material until you get a base smooth as silk. You can use a metal scraper for this step. Again, always scrape in the same direction, frop tip to tail. Scrape over and over until it doesn’t remove anything anymore. Your base should be perfectly flat. Pass your finger on it, you shouldn’t feel any bump or hole. You’re done.
How deep can a gouge be until you cannot repair it anymore?
If you took a strong impact on your base and have a deep or large gouge, repairing it with a stick of PTex (polyethylen) will not work or it won’t hold very long. You will need to use a patch of ptex that will replace an entire piece of your base that you will need to remove beforehand. This type of repair is not as easy as the first one. If you have never done it before, better let a trained professional do or have somebody who is familiar with this technique with you.
How to repair an edge that got bent or a section of it is missing?
If your edge was hit, things are more serious. Repairing an edge that got torn off is difficult and sometime impossible. In certain cases, if the core was spared, it may be possible to use a base patch and replace the missing section of your edge. The tricky bit comes when you will need to polish the new piece of base until it gets perfectly flat and when you will need to tune the new edge section the same was as the rest. You got it, this type of repair is not for beginners. Bring it to the shop or make sure you or your friends know what you are doing.
Have a look at our base repair corner


