Before you even tie your laces, remember that the right backpack makes all the difference: it protects your back, helps you stay organised, and maximises your self-sufficiency. Whether you’re heading out for a day walk or a multi-day trek, follow our step-by-step guide to find the perfect travel companion.
5 key points
- The ideal capacity: 10–30L (day hikes), 30–50L (weekends), 50L+ (treks).
- Comfort is everything: ventilated back panel + padded hip belt.
- Smart organisation: front access, lower compartment, quick-access pockets.
- Reliable materials: ripstop nylon or high-density polyester, water-repellent finish = 1,500 mm.
- Controlled weight: packed weight should not exceed 20% of your body weight.
Contents
- What volume for which type of hike?
- Carrying comfort: a decisive factor
- The carrying system: another key factor for comfort
- Comparison of hiking backpacks with or without a frame
- Organisation and useful features for a backpack
- Use cases: find the backpack that’s right for you
- Men’s, women’s and children’s hiking backpacks: a fit for everyone
- What about weight?
- Durability and materials
- Glisshop tips
- Frequently asked questions
- A few bonus tips for your hiking backpack
- Integrated hydration systems
- Also worth exploring
Usage and Frequency of Use for a Thoughtful Investment
Assessing Your Hiking Habits
Before investing in a hiking backpack, take the time to objectively evaluate your habits and actual needs. A backpack suited to your activity will not only be more comfortable but also more durable and cost-effective in the long run.
Frequency of Your Hikes
- Occasional hiker (a few outings per year): opt for a versatile backpack that can also be used for other activities (travel, weekend trips)
- Regular hiker (monthly outings): invest in a mid-range backpack that offers good value for money
- Frequent hiker (weekly outings): don’t hesitate to invest in a high-end backpack that will stand the test of time
Types of Terrain Covered
- Marked trails with minimal technical difficulty: a standard backpack will suffice
- Varied terrain with moderate elevation changes: look for a backpack with good back support and an effective hip belt
- High-altitude or technical terrain: choose a technical backpack with reinforcements and specialised features
Choosing the Right Backpack Size for Your Body Shape
It is essential to choose a hiking backpack that suits your body shape to avoid back pain and poor adjustments. Backpacks for men, women, and children come in different sizes and shapes to accommodate various body types.
Men's Backpacks
Men’s backpacks are typically designed with a longer back panel and wider shoulder straps, suited to a typical male build. They provide good support for broader shoulders and a longer torso.
These models usually feature a higher hip belt and wider-spaced shoulder straps to accommodate a broader chest. The chest straps are also positioned lower compared to women’s models.
Women's Backpacks
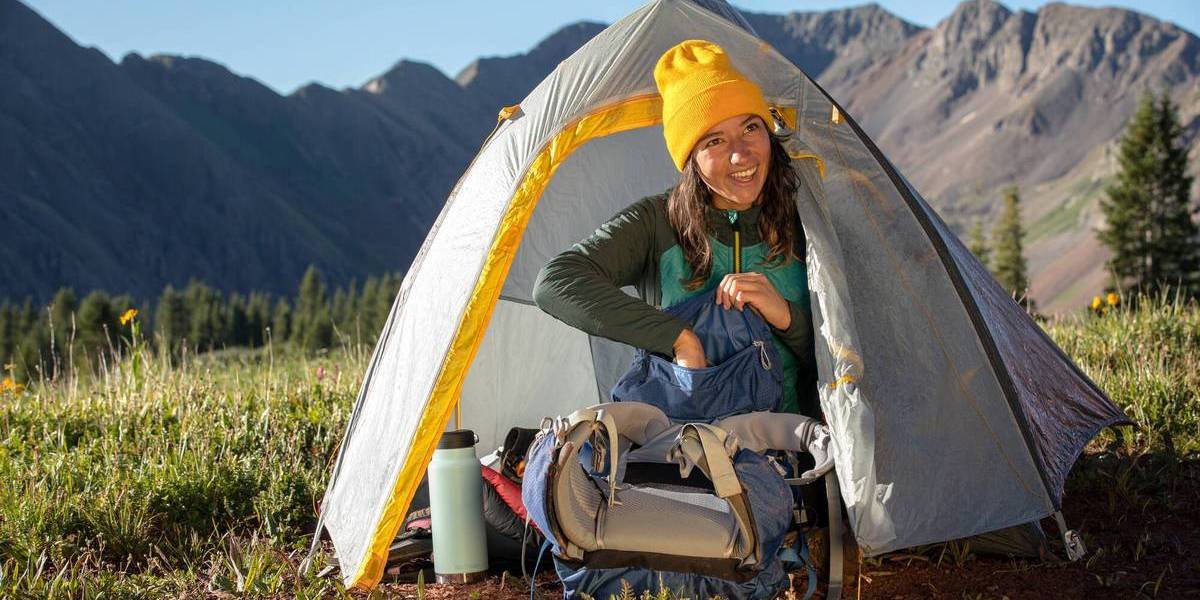
Women’s backpacks are generally shorter in the back and narrower at the shoulders. Some brands, such as Deuter, develop models specifically designed for female hikers.
It is worth noting that most backpacks are unisex. Some women’s models may also be suitable for men with a smaller frame. Before purchasing, it is important to check the technical specifications to ensure the backpack suits your body shape.
Children’s backpacks
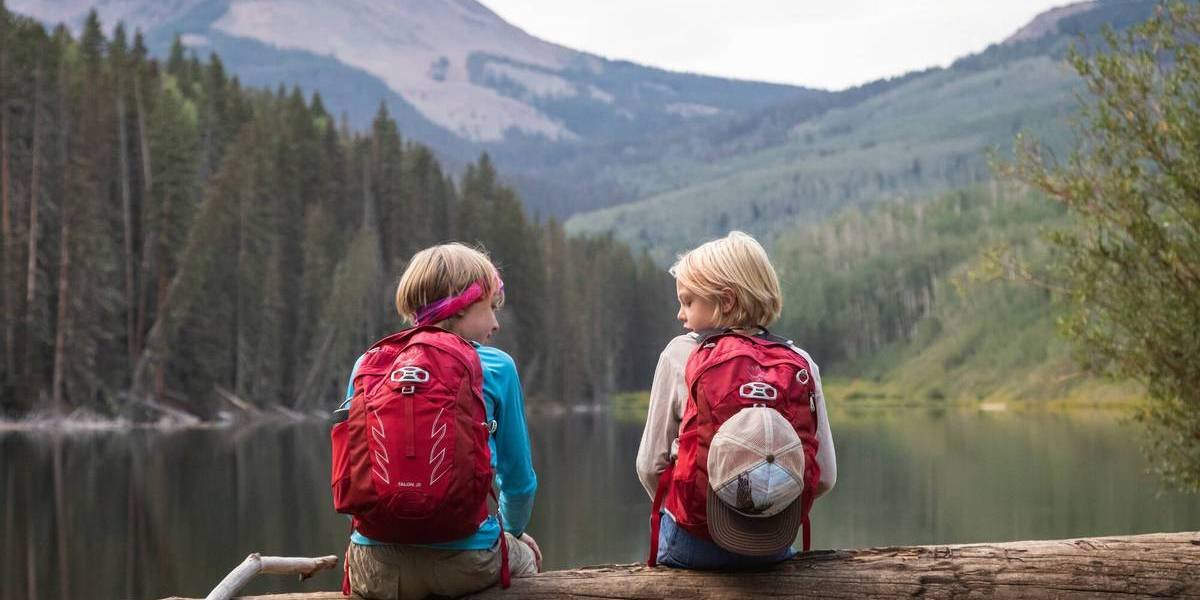
Children’s backpacks are designed for young hikers. They are generally small and lightweight to correspond to the size and weight of kids.
What volume for which type of hike?
Guide to choosing the right backpack capacity
The first factor to consider is the duration of your outing. You don’t need the same capacity for a quick hike as you do for a fully self-sufficient trek.
| Type of outing | Duration | Recommended volume |
|---|---|---|
| Walk or day hike | 1 day | 10 to 30 litres |
| Weekend with light bivvy equipment | 2–3 days | 30 to 50 litres |
| Multi-day trek with full camping gear | 4 days or more | 50 to 75+ litres |
Tip: It’s better to go for a slightly larger pack than one that’s too small. If you’re just starting out, it’s wise to allow a 10–15% margin so you’re not short on space. But beware the trap of packing everything ‘just in case’.
Fast hiking backpack (under 15 litres)
For fast hikes, opt for lightweight and compact backpacks of under 15 litres, ideal for carrying only the bare essentials such as a rain jacket, snacks, small accessories, a water bottle or a hydration bladder (if not already integrated). For example, the RAB Tensor 10 and the Millet Mixt 15 are perfect for this type of activity.
Small daypack (15 to 30 litres)
For day hikes, a backpack with a capacity of 15 to 30 litres is generally sufficient. In good weather, a 15 to 20-litre pack will usually do, whereas if the weather is uncertain or changeable, a 30-litre model gives you space for extra clothing. For example, the Dakine Heli Pro 20 or the Lafuma Active 24 are both great options for day hikes.
Need some inspiration to find a small day hiking backpack? Check out our selection of 1-day backpacks.
Multi-day hiking backpack with bivvy gear (30 to 60 litres)
For 2- to 3-day hikes, a 30 to 60-litre backpack is usually necessary to carry a sleeping bag, sleeping mat, and other camping gear.
Also explore our range of 2-day and longer backpacks for lightweight bivvy trips.
Backpacks for backpacking and trekking (60, 70 litres and more)
For multi-day adventures, you’ll need a 60-litre or larger trekking backpack capable of carrying all your hiking gear. For example, the Vaude Avox 60+10 or the Deuter Aircontact Core 70+10 are ideal for extended trips.
Discover more examples of trekking backpacks.
Carrying comfort: a decisive factor
Back panel, ventilation, and stability
Hiking backpacks are generally fitted with a padded back panel featuring a ventilation system to reduce excessive sweating on the hiker’s back. However, there are also models known as suspended mesh backs or ventilated backpacks. In these designs, it’s not the back panel that rests directly against your back, but a mesh fabric that promotes air circulation thanks to its breathable structure. This type of backpack is particularly appreciated in hot weather. It’s best suited for outings on relatively even trails with light loads.

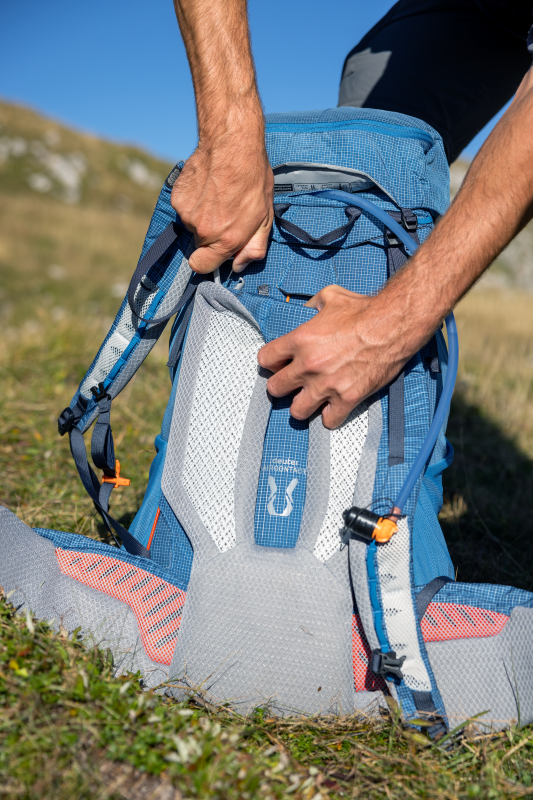
Padded foam back panel

Suspended mesh back panel
| Back panel type | Recommended uses | Advantages | Limitations |
|---|---|---|---|
| Suspended mesh: optimal ventilation |
|
|
|
| Padded foam: stability and comfort |
|
|
|
| Tensioned mesh (trampoline): versatility |
|
|
|
The carrying system: another key factor for comfort
The carrying system is one of the most important factors to consider. A well-designed system ensures both comfort and stability—essential for enjoying your hikes to the fullest.
How to assess the carrying quality of a backpack
Before buying a hiking or trekking backpack, check the following elements:
- Padded and adjustable shoulder straps that fit your body shape and don’t dig into your shoulders. Ideally, the straps should be breathable for better comfort, especially in warm weather.
- A sufficiently wide, sturdy, and well-padded hip belt to relieve your shoulders by distributing the weight across your hips.
- An adjustable chest strap to stabilise the load.
- An ergonomic back panel that follows the shape of your back and provides good lumbar support. Ideally, it should be adjustable to suit your body size (especially if you’re particularly tall or short).
- Back ventilation system: suspended mesh, perforated foam... anything that helps prevent a sweaty back is a plus!
- Load-lifter straps to help fine-tune the position of the pack.
You should try it on with a load, either in-store or at home—without exceeding 20% of your body weight. It’s the only reliable way to judge real comfort. Try it fully loaded to simulate real hiking conditions. A properly fitted backpack shouldn’t move excessively as you walk and should transfer most of the weight to your hips rather than your shoulders.
For long-distance hiking or trekking, opt for models with external attachment points to carry extra gear (like a sleeping mat or sleeping bag). This helps improve balance and load distribution.

Comparison of hiking backpacks with or without a frame
Over the years, backpack design has evolved significantly. Some old external-frame models can still be found second-hand, but they’re heavy and feel like something from another era! Today, most hiking backpacks either have no frame at all or feature an internal one hidden inside the pack.
What’s it for?
Internal frame: perfect for long-distance adventures. It helps distribute the load evenly. You can carry a sleeping bag, tent, mess kit, and enough food for several nights of near self-sufficiency.
Frameless: these packs are much lighter. They’re designed mainly for half-day or day hikes, encouraging you to bring only the essentials and avoid turning a pleasant walk into a mule-style carry session!
In short, choose a pack that matches your plan: sturdy and supportive for long hikes, featherlight and minimalist for fast getaways. Your back will thank you.
| Frame type | Advantages | Disadvantages |
|---|---|---|
| Internal frame |
|
|
| Frameless |
|
|
| External frame (now very rare) |
|
|
Organisation and useful features for a backpack
Some features can really make a difference—here are a few examples grouped by category:
Access and storage
- Front or side access to avoid unpacking everything during each break
- Lower compartment for your sleeping bag or dirty clothes
- Hip belt pockets for quick access to your phone, map, or snacks
- Side pockets for water bottles or camera tripods
Hydration and protection
- Compatible with 2- or 3-litre hydration bladders (with hose port)
- Integrated rain cover or dedicated compartment for one
Technical accessories
- Straps for carrying trekking poles or an ice axe
- External attachment points (carabiners, daisy chains, mesh nets)
- Side compression straps to adjust the pack’s volume to its contents
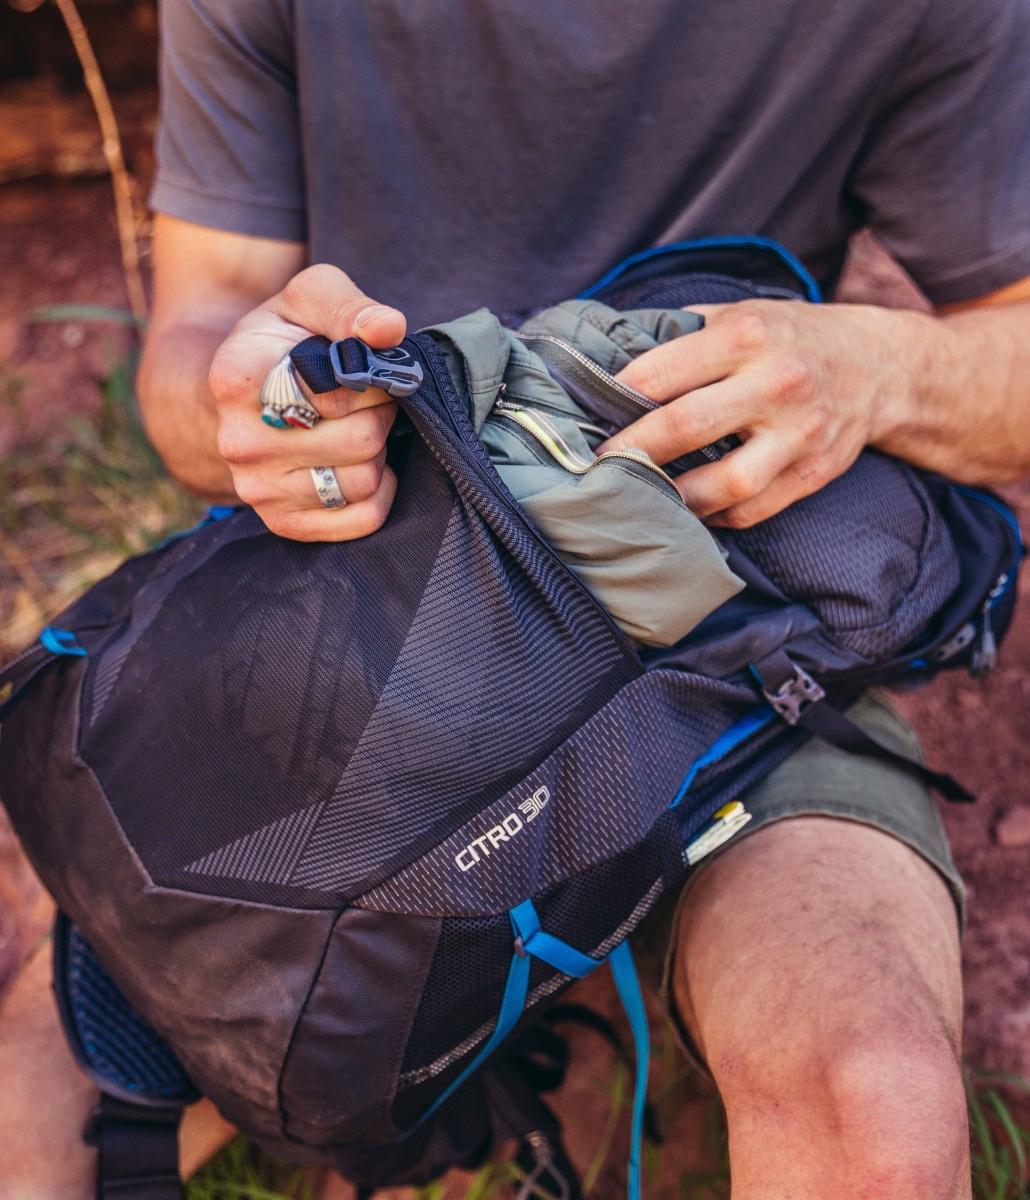
Use cases: find the backpack that’s right for you
| Profile | Typical duration | Target load (kg) | Requirement | Ideal choice |
|---|---|---|---|---|
| Nature photographer | 1 day | ≤ 10 kg | Quick access to equipment | 20–30L pack with side opening + modular compartments |
| Solo trekker | 3–7 days | 15–20 kg | Heavy load, self-sufficiency | 60–75L with rigid frame |
| Minimalist hiker | 1–3 days | < 10 kg | Featherweight setup | 30–40L ultra-light pack, stripped of extras |
| Mountaineer | 1–2 days | 12–18 kg | Carrying options, durability | 45–55L pack with reinforced base + ice axe/helmet straps |
Men’s, women’s and children’s hiking backpacks: a fit for everyone
You should choose a hiking backpack that suits your body shape to avoid back pain and poor adjustment. Backpacks for men, women and children come in different sizes and shapes to accommodate different bodies. The main factors are back length, shoulder width, and hip shape. Brands offer several designs, choose the one that fits your build best.
What about weight?
Backpack weight should not be overlooked, especially if you’re planning a multi-day hike. Choose packs that are lightweight yet durable, so you’re not overloaded. It’s important to strike a good balance between the pack’s weight and its storage capacity to maintain optimal carrying comfort. Even for trekking packs, go for a model that can handle heavy loads while keeping overall weight to a minimum.
Durability and materials
Make sure your hiking backpack is made from water-resistant materials to protect your gear from the elements. Check whether it features a waterproof coating such as PU (polyurethane), PVC (polyvinyl chloride), or TPU (thermoplastic polyurethane)—the latter being more flexible and durable than PVC and often used for high-end waterproof packs.
While construction depends on the manufacturer, it’s important to choose quality materials like ripstop nylon or high-density polyester for better durability. To reduce environmental impact, more and more backpacks are now made from recycled materials to optimise resource use, and in factories favouring short supply chains for more sustainable production.
Glisshop tips
Take time to read the descriptions and feature lists and browse our photos. They’re a goldmine of information for evaluating the quality of the backpacks we offer.
Before buying, carefully check the technical specifications, the full list of features, and the detailed photos—they’ll help you assess the real volume, ergonomics, and finish quality of the backpack on your own.
Check out our guide to cleaning and caring for your backpack.
The ultimate checklist before you buy
- The volume matches my needs
- The pack is comfortable, even when loaded
- It offers good organisation for my gear
- It’s compatible with my equipment (tent, mat, hydration bladder, etc.)
- It’s built to last (seams, fabric, zips, etc.)
The 5 key points for comfort
- Adjustable back length: the panel should sit at shoulder blade level and be sized correctly for your height.
- Padded hip belt: supports 80% of the weight on the hips, not the shoulders.
- Ergonomic shoulder straps: S-shaped design, comfortable foam, no pressure points under the arms.
- Breathable back panel: either suspended mesh for ventilation or perforated foam for stability—depending on climate and load.
- Load-lifter + chest straps: pull the load closer to your back and stop the straps from spreading apart on uneven terrain.
Our favourite brands in 2025
- Osprey : lifetime ‘All-Mighty Guarantee’ directly from the brand on all backpacks
- Deuter : lifetime repair service through the brand, plus 2-year free warranty
- Millet : Ubic 50+10 = 1,887 g, made from 100% recycled fibres
- Lafuma : Active 18 = 320 g, PFC-free water-repellent fabric
- Salomon: Trailblazer 30 = 580 g for 30L (ideal for light hiking)
Discover Glisshop’s selection of the best hiking backpacks of 2025
Frequently asked questions
How do you properly fit and adjust a backpack?
- Preparation (10 sec.): Start by loosening all straps—shoulder straps, load-lifter straps and hip belt—to make adjustments easier once the pack is on.
- Step 1 – Hip belt (15 sec.): Position it over your hips, at the level of your iliac crest. Once properly tightened, it should transfer almost the entire load to your pelvis, relieving your shoulders.
- Step 2 – Shoulder straps (10 sec.): Pull the shoulder straps to bring the backpack closer to your back, but without over-tightening. They shouldn’t carry the weight, only keep the pack snug.
- Step 3 – Chest strap (10 sec.): Position it just above the chest. It keeps the shoulder straps from slipping off without applying pressure.
- Step 4 – Load-lifter straps (5 sec.): Tighten them slightly to bring the top of the backpack closer to your upper back and avoid the feeling of it pulling backwards.
- And there you go—you’ve adjusted your backpack in under a minute.
Check out our tutorial: How to adjust your hiking backpack
How do you try on a hiking backpack properly?
- Ideally, try the backpack with a load similar to what you plan to carry on your hike to judge comfort under real conditions.
- Adjust the hip belt and shoulder straps to avoid discomfort in the hips and shoulders.
- Place the hip belt around your hips—not your waist—so the weight rests on your pelvis rather than your shoulders.
- Tighten the shoulder straps to keep the pack snug against your back, but make sure you can still fit a couple of fingers between the strap and your shoulder. Avoid any rubbing under the arms.
- The top of the pack should sit at shoulder blade level—not above. Adjust the back length if the backpack offers that option.
- Walk around with the adjusted pack: watch out for any rubbing or discomfort that could become an issue during longer hikes.
What determines the quality of a backpack?
There are several technical factors to consider when assessing a backpack’s quality:
Carrying comfort
- Adjustable back length
- Padded or mesh back panel (ability to allow air circulation)
- Shoulder straps and hip belt
- Load-lifter straps
- Compression straps
Material durability
- Durable fabrics (nylon, ripstop, etc.)
- Reinforced stitching
- Water-repellent finish
Ergonomics
- Empty pack weight
- Number of pockets and compartments (ease of access)
Features
- Pole holder
- External attachment points (elastic cords, cord locks, daisy chain, etc.)
- Hydration bladder compatibility
- Built-in rain cover


How do you assess the best value for money in a backpack?
If you’re looking for a backpack for hiking, you might be wondering: do I need to spend more to get a good one? Some models are very affordably priced, while others come with a higher price tag. But how can you tell if it’s worth spending a bit more?
At Glisshop, we believe that value for money isn’t a universal metric, but rather a personal assessment based on your real needs. Here’s how you can evaluate it for yourself, with complete confidence.
What does value for money mean in the world of hiking and trekking?
Value for money is the balance between quality, features, practicality and your own psychological price point—what you personally feel comfortable paying.
But this perception differs from person to person. A £170 ultra-light pack may be an excellent investment for long-distance hiking enthusiasts. On the other hand, someone who only goes for the occasional walk may not want to spend more than £40 on a pack.
A few bonus tips for your hiking backpack
Choosing a good backpack is one thing. Knowing how to make the most of it once you’re on the trail is another. A few simple but effective tips can really improve your comfort and organisation while walking. So here are some extra tips, inspired by seasoned hikers, to help you get the most from your gear.
Access and compartments: smart organisation
A well-designed backpack is one that lets you find what you need without having to unpack everything. When you're out in the wild, being able to easily access your gear makes a real difference. Good organisation avoids endless stops rummaging around at the bottom of your pack—saving time and energy to truly enjoy your hike. That’s where the type of opening really matters.
- Top-loading opening: the classic design for hiking packs. Great for keeping out rain and dirt, but less convenient when trying to reach items buried at the bottom. Sometimes you have to take everything out just to find a pair of socks.
- Front opening: turns your pack into a suitcase. At a glance, you see the entire contents and can reach what you need without disrupting the rest. Extremely handy for staying well organised.
- Dual access: the best of both worlds! You can open it from the top and the front or side. Result: excellent flexibility, especially on the go or when you need to grab something quickly without making a mess.
- Separate bottom compartment: very useful for isolating certain items—like a sleeping bag or wet clothes. Thanks to a separate zip, everything stays in its place, and more importantly, stays dry.
- Insulated compartment or pocket (on some high-end models): keeps your water cool for hours, even in hot conditions. A real luxury in summer—especially after a long, sunny climb.

Internal organisation: a real game of Tetris
Packing the inside of your backpack properly is like solving a good puzzle: everything has its place, and life on the trail gets much easier.
- The main compartment is the heart of the pack. It should be spacious enough to hold all the essentials—clothing, cooking gear, sleeping system—while remaining easy to access. A well-designed volume makes it simple to fit bulky items without struggling every time you need something.
- Internal dividers are key to staying organised. Fixed or removable depending on the model, they allow you to create distinct zones: one for sleeping gear, one for food, another for clothes... no more chaos where everything ends up mixed together.
- Zipped internal pockets are perfect for valuables you don’t want to lose or damage—ID, bank card, keys, phone... They stay protected and exactly where you expect them.
- Modular compartments offer real flexibility. Off on a day hike? Reduce the space. Going for several days? Expand it. Some zip or Velcro systems even let you merge pockets to adapt your pack for every outing.
Check out our tips for efficiently organising your hiking backpack.

External pockets to avoid endless rummaging: a must-have
When you’re out on the trail, the last thing you want is to unpack your whole bag just to grab an energy bar or your rain jacket. That’s where well-placed external storage really makes a difference.
- Elasticated side pockets: perfect for keeping your water bottles or useful items within easy reach. Thanks to their stretch, everything stays secure, and you can grab a bottle without even stopping. Ideal for switching between a water bottle and a hydration bladder—easy to access one-handed, without taking off your pack.
- Expandable front pocket: your best friend when the weather turns. It’s great for quickly stashing a waterproof jacket or map. You can reach it without opening the main compartment—a lifesaver when the clouds roll in faster than expected.
- Hip belt pockets: super convenient for having your phone, snack, or compact camera close at hand. No need to take the pack off—saving both time and effort.
- Top lid pocket: sunglasses, sun cream, tissues, snacks… all the essentials you use regularly fit here. Positioned at the top of the pack, it’s always easy to access during a break.
- External mesh pockets: ideal for wet clothes or accessories that need airing out. Thanks to their breathable design, air flows freely while everything stays securely in place as you walk.
- Shoulder strap bottle holder: a brilliant solution for fast-paced hikes. A soft flask or small bottle stored right at the front means you can drink without even slowing down.

Smart little extras... that make all the difference!
Beyond standard pockets, some built-in features and specific storage options can truly transform your experience in the field. They may not look like much at first glance, but they quickly prove indispensable on the trail.
- Transparent map holder: clever and practical, it lets you check your route without taking the map out in the wind or rain. Placed on top of the pack or in a dedicated pocket, one glance is all it takes to stay on track.
- Trekking pole attachments: since you don’t always need your poles, it’s helpful to store them quickly. These attachments keep your poles secure and out of the way—no snags on branches.
- Compression straps: two functions in one. They compress the pack when it's not full (to prevent wobbling) and keep the load stable—ideal for balance on the move.
- External attachment points: essential for gear that doesn’t fit inside. A sleeping mat, lightweight tent or wet jacket can easily be strapped on using these loops or cords.
- Built-in rain cover: usually stored in a pocket under the pack, it deploys in seconds when clouds roll in. No need to carry a separate cover or dig through your gear—your pack stays dry, even in a sudden downpour.
- Emergency whistle on the chest strap: tiny but potentially life-saving. In case of a fall, disorientation, or if you need help in a remote area, this whistle lets you signal your position without exhausting yourself shouting.
- Holders for ice axe or trekking poles: a must if you're heading into the mountains or technical terrain. These keep your gear secure, accessible, and save you from makeshift solutions that don’t hold up.
- Side compression straps: mentioned before, but worth repeating. They stabilise the pack, reduce its volume when not full, and prevent gear from shifting—lightening your step and avoiding late-day aches.
- Sleeping mat holder under the pack: these adjustable straps are perfect for carrying a mat externally, freeing up internal space while keeping your load balanced and secure.
- Adjustable back system: true custom comfort. Being able to adapt the back panel length to your body shape means the pack hugs your back properly—less rubbing, fewer aches, especially on long hikes. A must for multi-day trips or adaptability to various body types.
- Daisy chain loops: these stitched loops on the outside of the pack offer loads of flexibility. You can clip on ropes, carabiners, crampons—anything you don’t want inside but still want within reach.
- Removable straps: if you like to adapt your pack for each trip, you’ll love these. Add or remove attachment points depending on the gear you’re carrying. Ideal for switching from a light hike to a gear-heavy adventure without changing your pack.
- Sleeping bag straps: usually under the pack, they let you attach your sleeping bag outside—saving internal space. Properly secured and well-positioned, it stays balanced and easy to reach at camp.
- Helmet attachment system: if you engage in mountaineering or climbing, this is a must-have. These loops keep your helmet safely fixed to the outside of your pack—no bouncing, no damage—and ready to grab before a technical section.


Integrated hydration systems
While hiking, aim for around 0.5L of water per hour (more in hot weather).
A well-designed backpack makes staying hydrated easier. Here are the features that help you drink on the go without slowing your pace.
- Dedicated hydration bladder compartment: most modern packs include a special pocket, often positioned against the back. This is the ideal spot—close to your centre of gravity for better balance and well protected from friction or sharp gear.
- Insulation for the compartment or hose: very handy in extreme temperatures. It prevents the water from freezing in winter or overheating in summer.
- Hydration hose port: most packs feature a discreet opening to route the drinking tube up to the shoulder strap. No more dangling or tangled tubes—everything stays neatly in place.
- Clips to keep the tube close to your mouth: a small detail that adds a lot of comfort. These clips hold the tube exactly where you need it—no fumbling, just sip and keep walking.
- Compatibility with various hydration bladders: a good pack fits 2–3L models from most brands. This gives you the freedom to choose your preferred system or replace the bladder without changing the whole pack.

Ergonomics that support your adventure
Every little detail matters when you're walking for hours with a backpack on your back. The features we've just discussed may not be essential for everyone, but if they match your needs, they can truly enhance your experience on the trail. Beyond comfort, the ideal pack is one that lets you access all your gear easily—without having to stop and unpack everything every time you need something.
Also worth exploring
To complete your preparation, these in-depth guides offer further insights into related topics:
Backpacking in the Mountains
How to prepare
First trek
How to be well prepared?
How to Plan a Mountain Hike?
Best practices for a safe and enjoyable mountain hikes.
Common Mistakes to Avoid When Starting Out Hiking
A guide to avoiding frequent mistakes and starting your hiking journey with confidence.
