88534756
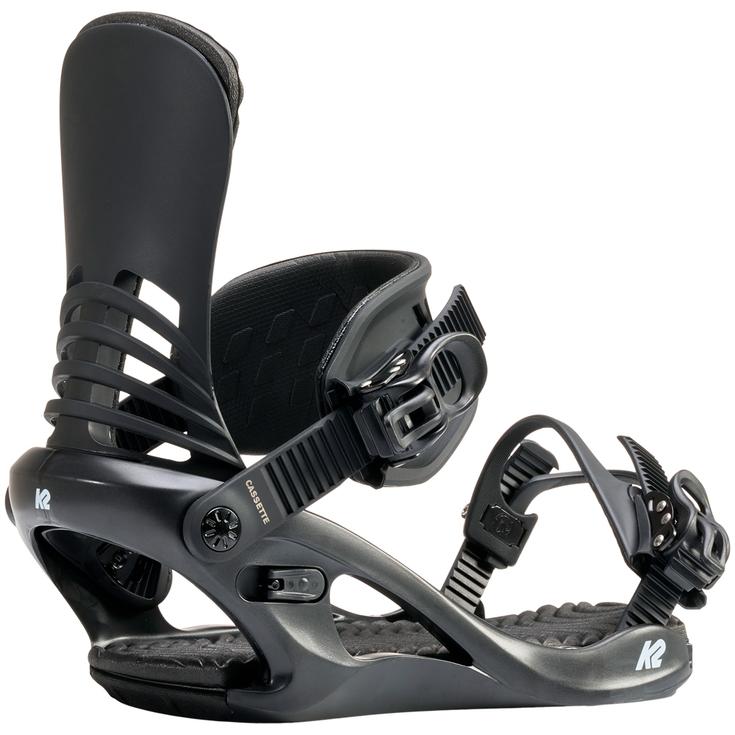
Cassette Black
https://www.glisshop.co.uk/snowboard-bindings/k2/cassette-black88534756
K2
Women
Winter 2027
88534756
The K2 Cassette Black women's snowboard binding meets the needs of female riders looking for comfort, affordability, and versatility to help them progress with confidence.
https://glisshop-glisshop-fr-storage.omn.proximis.com/Imagestorage/imagesSynchro/0/0/d013aa82b12b48e2a95ec76065840159dd7f0fc5_H27KDEUBIN5584583_0.jpeg
https://glisshop-glisshop-fr-storage.omn.proximis.com/Imagestorage/imagesSynchro/0/0/e3ec86d74b351ef20ba647b4478aca51a4c49ade_H27KDEUBIN5584583_2.jpeg
https://glisshop-glisshop-fr-storage.omn.proximis.com/Imagestorage/imagesSynchro/0/0/b5062d877a663025a9517e1fe2b276f2125b5a3d_H27KDEUBIN5584583_3.jpeg
https://glisshop-glisshop-fr-storage.omn.proximis.com/Imagestorage/imagesSynchro/0/0/6f38186a0d52259d0d16c4645f60fb5b3b0f4892_H27KDEUBIN5584583_4.jpeg
InStock
175.91
GBP
175.91
GBP_VAT_royaume_uni
GBP_VAT_france
175.91
175.91
GBP
packs always have stock if there is a price
InStock
GBP_VAT_france_corse
175.91
175.91
GBP
packs always have stock if there is a price
InStock
GBP_VAT_espagne
177.38
175.91
GBP
packs always have stock if there is a price
InStock
GBP_VAT_italie
178.84
175.91
GBP
packs always have stock if there is a price
InStock
GBP_VAT_allemagne
174.45
175.91
GBP
packs always have stock if there is a price
InStock
GBP_VAT_pays_bas
177.38
175.91
GBP
packs always have stock if there is a price
InStock
GBP_VAT_belgique
177.38
175.91
GBP
packs always have stock if there is a price
InStock
GBP_VAT_suisse
158.47
175.91
GBP
packs always have stock if there is a price
InStock
GBP_VAT_suede
183.24
175.91
GBP
packs always have stock if there is a price
InStock
GBP_VAT_danemark
175.91
175.91
GBP
packs always have stock if there is a price
InStock
GBP_VAT_monaco
175.91
175.91
GBP
packs always have stock if there is a price
InStock
GBP_VAT_luxembourg
171.51
175.91
GBP
packs always have stock if there is a price
InStock
GBP_VAT_irlande
175.91
175.91
GBP
packs always have stock if there is a price
InStock
GBP_VAT_portugal
175.91
175.91
GBP
packs always have stock if there is a price
InStock
GBP_VAT_autriche
175.91
175.91
GBP
packs always have stock if there is a price
InStock
GBP_VAT_pologne
175.91
175.91
GBP
packs always have stock if there is a price
InStock
GBP_VAT_finlande
183.97
175.91
GBP
packs always have stock if there is a price
InStock
GBP_VAT_slovenie
175.91
175.91
GBP
packs always have stock if there is a price
InStock
GBP_VAT_france
175.91
175.91
GBP
packs always have stock if there is a price
InStock
GBP_VAT_france_corse
175.91
175.91
GBP
packs always have stock if there is a price
InStock
GBP_VAT_espagne
177.38
175.91
GBP
packs always have stock if there is a price
InStock
GBP_VAT_italie
178.84
175.91
GBP
packs always have stock if there is a price
InStock
GBP_VAT_allemagne
174.45
175.91
GBP
packs always have stock if there is a price
InStock
GBP_VAT_pays_bas
177.38
175.91
GBP
packs always have stock if there is a price
InStock
GBP_VAT_belgique
177.38
175.91
GBP
packs always have stock if there is a price
InStock
GBP_VAT_suisse
158.47
175.91
GBP
packs always have stock if there is a price
InStock
GBP_VAT_suede
183.24
175.91
GBP
packs always have stock if there is a price
InStock
GBP_VAT_danemark
175.91
175.91
GBP
packs always have stock if there is a price
InStock
GBP_VAT_monaco
175.91
175.91
GBP
packs always have stock if there is a price
InStock
GBP_VAT_luxembourg
171.51
175.91
GBP
packs always have stock if there is a price
InStock
GBP_VAT_irlande
175.91
175.91
GBP
packs always have stock if there is a price
InStock
GBP_VAT_portugal
175.91
175.91
GBP
packs always have stock if there is a price
InStock
GBP_VAT_autriche
175.91
175.91
GBP
packs always have stock if there is a price
InStock
GBP_VAT_pologne
175.91
175.91
GBP
packs always have stock if there is a price
InStock
GBP_VAT_finlande
183.97
175.91
GBP
packs always have stock if there is a price
InStock
GBP_VAT_slovenie
175.91
175.91
GBP
packs always have stock if there is a price
InStock
CHF_VAT_france
191.9
191.9
CHF
packs always have stock if there is a price
InStock
CHF_VAT_france_corse
191.9
191.9
CHF
packs always have stock if there is a price
InStock
CHF_VAT_royaume_uni
191.9
191.9
CHF
packs always have stock if there is a price
InStock
CHF_VAT_espagne
193.5
191.9
CHF
packs always have stock if there is a price
InStock
CHF_VAT_italie
195.1
191.9
CHF
packs always have stock if there is a price
InStock
CHF_VAT_allemagne
190.3
191.9
CHF
packs always have stock if there is a price
InStock
CHF_VAT_pays_bas
193.5
191.9
CHF
packs always have stock if there is a price
InStock
CHF_VAT_belgique
193.5
191.9
CHF
packs always have stock if there is a price
InStock
CHF_VAT_suisse
172.87
191.9
CHF
packs always have stock if there is a price
InStock
CHF_VAT_suede
199.9
191.9
CHF
packs always have stock if there is a price
InStock
CHF_VAT_danemark
191.9
191.9
CHF
packs always have stock if there is a price
InStock
CHF_VAT_monaco
191.9
191.9
CHF
packs always have stock if there is a price
InStock
CHF_VAT_luxembourg
187.11
191.9
CHF
packs always have stock if there is a price
InStock
CHF_VAT_irlande
191.9
191.9
CHF
packs always have stock if there is a price
InStock
CHF_VAT_portugal
191.9
191.9
CHF
packs always have stock if there is a price
InStock
CHF_VAT_autriche
191.9
191.9
CHF
packs always have stock if there is a price
InStock
CHF_VAT_pologne
191.9
191.9
CHF
packs always have stock if there is a price
InStock
CHF_VAT_finlande
200.7
191.9
CHF
packs always have stock if there is a price
InStock
CHF_VAT_slovenie
191.9
191.9
CHF
packs always have stock if there is a price
InStock
CHF_VAT_france
191.9
191.9
CHF
packs always have stock if there is a price
InStock
CHF_VAT_france_corse
191.9
191.9
CHF
packs always have stock if there is a price
InStock
CHF_VAT_royaume_uni
191.9
191.9
CHF
packs always have stock if there is a price
InStock
CHF_VAT_espagne
193.5
191.9
CHF
packs always have stock if there is a price
InStock
CHF_VAT_italie
195.1
191.9
CHF
packs always have stock if there is a price
InStock
CHF_VAT_allemagne
190.3
191.9
CHF
packs always have stock if there is a price
InStock
CHF_VAT_pays_bas
193.5
191.9
CHF
packs always have stock if there is a price
InStock
CHF_VAT_belgique
193.5
191.9
CHF
packs always have stock if there is a price
InStock
CHF_VAT_suisse
172.87
191.9
CHF
packs always have stock if there is a price
InStock
CHF_VAT_suede
199.9
191.9
CHF
packs always have stock if there is a price
InStock
CHF_VAT_danemark
191.9
191.9
CHF
packs always have stock if there is a price
InStock
CHF_VAT_monaco
191.9
191.9
CHF
packs always have stock if there is a price
InStock
CHF_VAT_luxembourg
187.11
191.9
CHF
packs always have stock if there is a price
InStock
CHF_VAT_irlande
191.9
191.9
CHF
packs always have stock if there is a price
InStock
CHF_VAT_portugal
191.9
191.9
CHF
packs always have stock if there is a price
InStock
CHF_VAT_autriche
191.9
191.9
CHF
packs always have stock if there is a price
InStock
CHF_VAT_pologne
191.9
191.9
CHF
packs always have stock if there is a price
InStock
CHF_VAT_finlande
200.7
191.9
CHF
packs always have stock if there is a price
InStock
CHF_VAT_slovenie
191.9
191.9
CHF
packs always have stock if there is a price
InStock
EUR_VAT_france
199.9
199.9
EUR
packs always have stock if there is a price
InStock
EUR_VAT_france_corse
199.9
199.9
EUR
packs always have stock if there is a price
InStock
EUR_VAT_royaume_uni
199.9
199.9
EUR
packs always have stock if there is a price
InStock
EUR_VAT_espagne
201.57
199.9
EUR
packs always have stock if there is a price
InStock
EUR_VAT_italie
203.23
199.9
EUR
packs always have stock if there is a price
InStock
EUR_VAT_allemagne
198.23
199.9
EUR
packs always have stock if there is a price
InStock
EUR_VAT_pays_bas
201.57
199.9
EUR
packs always have stock if there is a price
InStock
EUR_VAT_belgique
201.57
199.9
EUR
packs always have stock if there is a price
InStock
EUR_VAT_suisse
180.08
199.9
EUR
packs always have stock if there is a price
InStock
EUR_VAT_suede
208.23
199.9
EUR
packs always have stock if there is a price
InStock
EUR_VAT_danemark
199.9
199.9
EUR
packs always have stock if there is a price
InStock
EUR_VAT_monaco
199.9
199.9
EUR
packs always have stock if there is a price
InStock
EUR_VAT_luxembourg
194.9
199.9
EUR
packs always have stock if there is a price
InStock
EUR_VAT_irlande
199.9
199.9
EUR
packs always have stock if there is a price
InStock
EUR_VAT_portugal
199.9
199.9
EUR
packs always have stock if there is a price
InStock
EUR_VAT_autriche
199.9
199.9
EUR
packs always have stock if there is a price
InStock
EUR_VAT_pologne
199.9
199.9
EUR
packs always have stock if there is a price
InStock
EUR_VAT_finlande
209.06
199.9
EUR
packs always have stock if there is a price
InStock
EUR_VAT_slovenie
199.9
199.9
EUR
packs always have stock if there is a price
InStock
EUR_VAT_france
199.9
199.9
EUR
packs always have stock if there is a price
InStock
EUR_VAT_france_corse
199.9
199.9
EUR
packs always have stock if there is a price
InStock
EUR_VAT_royaume_uni
199.9
199.9
EUR
packs always have stock if there is a price
InStock
EUR_VAT_espagne
201.57
199.9
EUR
packs always have stock if there is a price
InStock
EUR_VAT_italie
203.23
199.9
EUR
packs always have stock if there is a price
InStock
EUR_VAT_allemagne
198.23
199.9
EUR
packs always have stock if there is a price
InStock
EUR_VAT_pays_bas
201.57
199.9
EUR
packs always have stock if there is a price
InStock
EUR_VAT_belgique
201.57
199.9
EUR
packs always have stock if there is a price
InStock
EUR_VAT_suisse
180.08
199.9
EUR
packs always have stock if there is a price
InStock
EUR_VAT_suede
208.23
199.9
EUR
packs always have stock if there is a price
InStock
EUR_VAT_danemark
199.9
199.9
EUR
packs always have stock if there is a price
InStock
EUR_VAT_monaco
199.9
199.9
EUR
packs always have stock if there is a price
InStock
EUR_VAT_luxembourg
194.9
199.9
EUR
packs always have stock if there is a price
InStock
EUR_VAT_irlande
199.9
199.9
EUR
packs always have stock if there is a price
InStock
EUR_VAT_portugal
199.9
199.9
EUR
packs always have stock if there is a price
InStock
EUR_VAT_autriche
199.9
199.9
EUR
packs always have stock if there is a price
InStock
EUR_VAT_pologne
199.9
199.9
EUR
packs always have stock if there is a price
InStock
EUR_VAT_finlande
209.06
199.9
EUR
packs always have stock if there is a price
InStock
EUR_VAT_slovenie
199.9
199.9
EUR
packs always have stock if there is a price
InStock
/Snowboard/Snowboard bindings
brand - 121662
109046 - GLIS_CHAR_SNOW_BINDING_ENTRY_SYSTEM_10055
109047 - GLIS_CHAR_SNOW_BINDING_CATEGORY_10061
211232 - 1
107027 - GLIS_NAME_TYPO_PRODUCT_26
211236 - GLIS_PROD_HIGHLIGHT_SEASON_42074
21127769 - 21127766